Using GTM to check cookie consent
There are a variety of ways you can confirm that a user has consented to analytics tracking using Google Tag Manager (GTM).
On GOV.UK, we have our own cookie banner component, and can read the cookie values this sets using GTM.
Some other services use alternative solutions, such as Cookiebot.
Using Cookiebot and GTM
Implementing the cookie consent banner in GTM
Set up cookiebot tag using the cookiebot CMP tag, or whichever method you are using to collect user consent.
Controlling cookies
Once you have set up the cookiebot tag you need to enable consent to be applied to any tags that require consent.
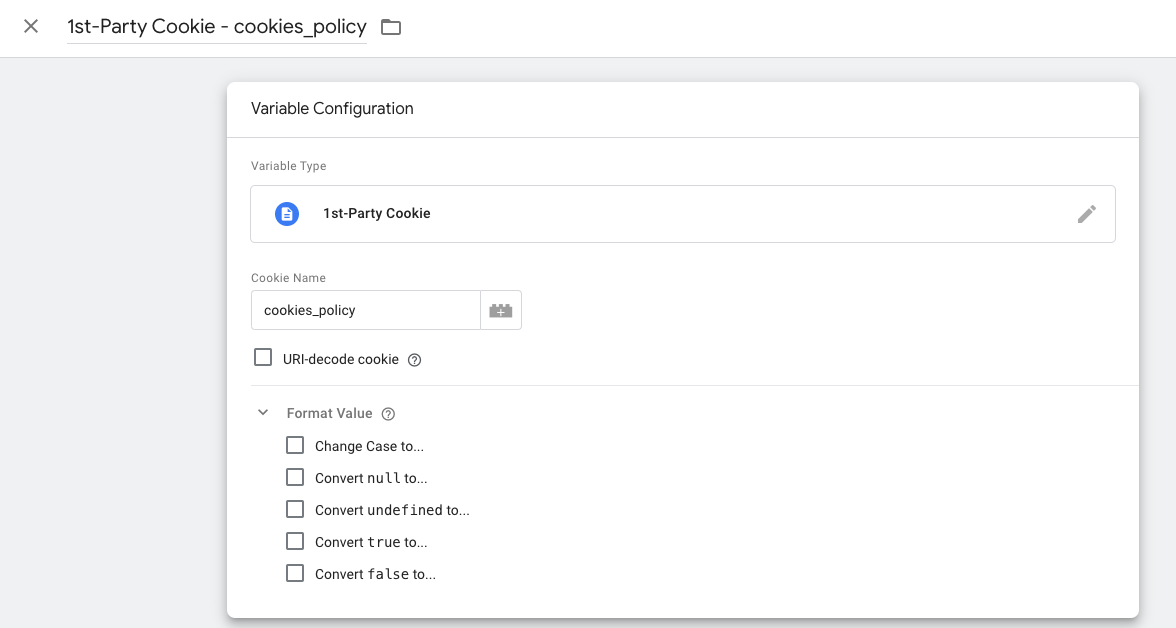
Cookie consent variable
A 1st party cookie user-defined variable should be created for cookie consent. The ‘Cookie Name’ should exactly match the cookie consent cookie naming convention.

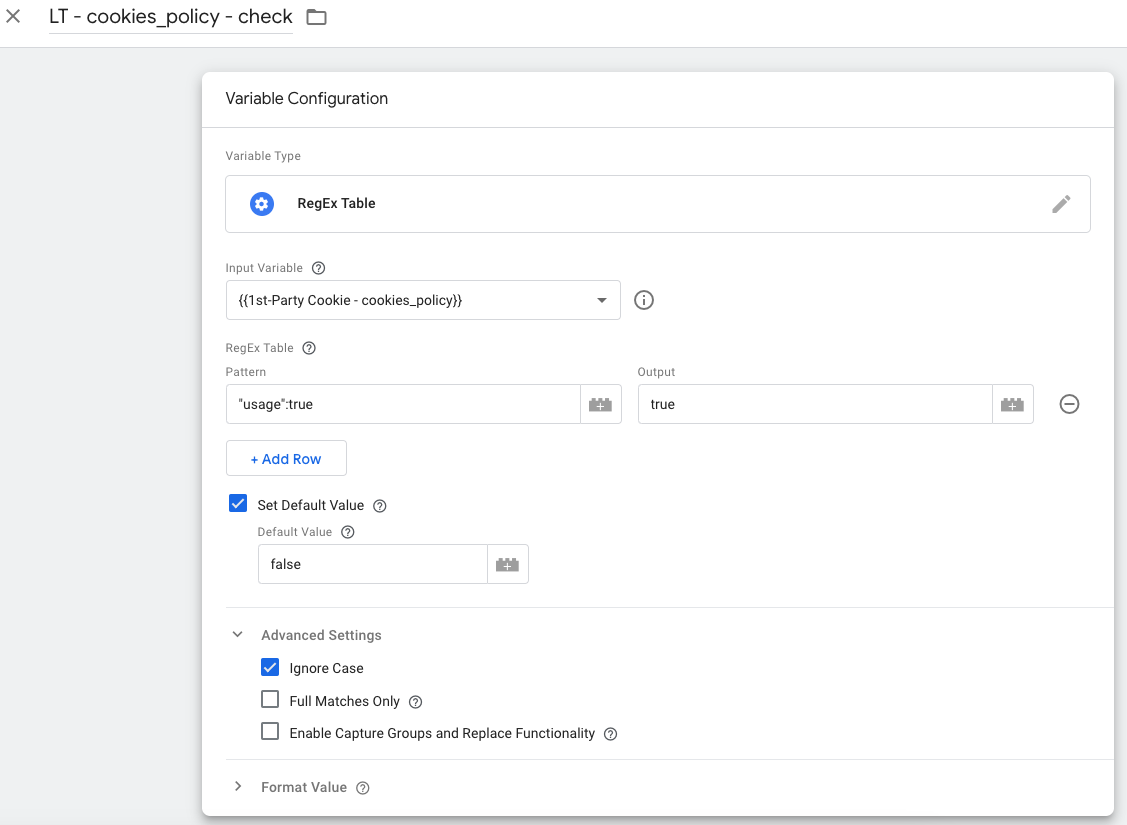
Analytics cookie value check variable
Firstly, The analytics cookie consent needs to be identified. This can be done using tag assistant. It should be contained on the variables tab and it can be identified in the CookieConsent variable. Make a note of this.

A second user defined variable needs to be created to identify the analytics cookie consent and the outputs. To do this, add the cookie consent variable that you set up in the previous step to the ‘Input Variable’. Set ‘Pattern’ to the analytics consent that has just been identified (in the example shown, this would be “statistics:true”) and ‘Output’ as “true”. Tick the ‘Set Default Value’ and set ‘Default Value’ as “false” In ‘Advance Settings’ deselect ‘Full Matches Only’ and ‘Enable Capture Groups and Replace Functionality’

Note this is only for analytics consent. Any marketing tags that require marketing consent need another variable. Adapt the ‘Pattern’ to contain the marketing consent e.g. “marketing:true”.
Blocking trigger
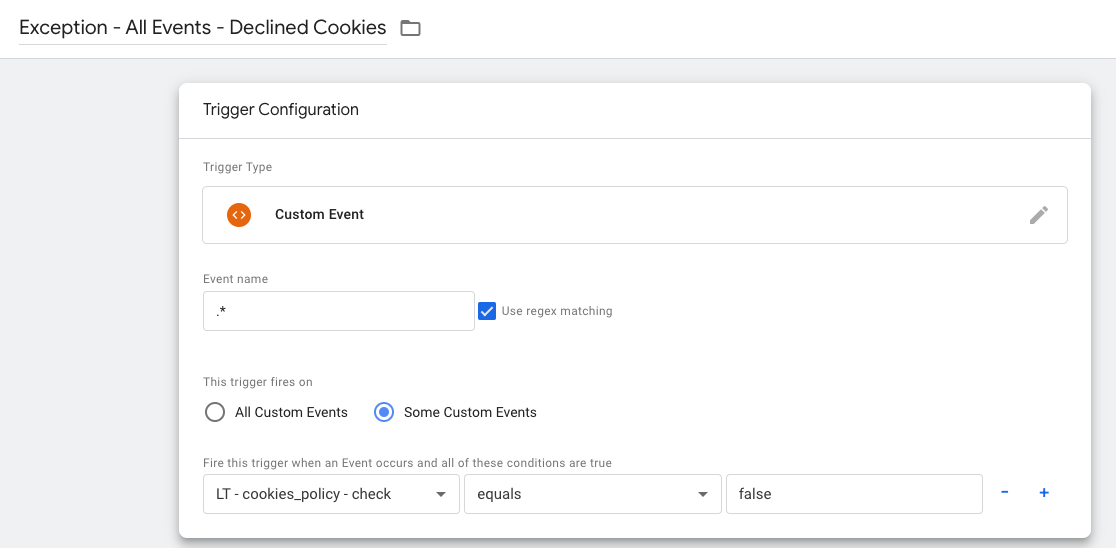
Then apply this variable to a Custom event trigger, this trigger needs to be set across all events. To do this, set the Event name to “.*” and tick ‘use regex matching’. The trigger should only be fired when cookies have not been accepted. To do this, select ‘Some Custom Events’ and select the variable you set up in the previous step in the variable dropdown. Set the condition to be “false”.

Note this is only for analytics consent. Any marketing tags that require marketing consent need another trigger to be created, use the marketing consent variable created in the previous step. Adapt the ‘This Trigger fires on’ to the marketing cookie policy check variable created in the previous step.
Update required tags
Final stage of set up is including this on all tags that require consent. Ensure that an exception is added to all tags that require consent as per below: